Transaction Posting
The Transaction Posting page can be used to create new manual Payment, Credit or Debit transactions for one or more accounts.
It is also used to pull in, review and post any real-time Credit Card or Bank Account payments made on an account.
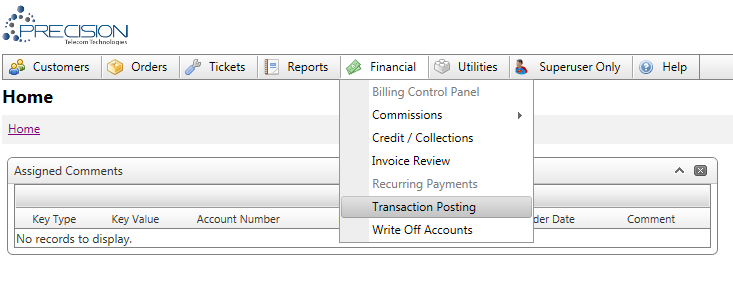
From the Financial menu select Transaction Posting.

Entering New Transactions
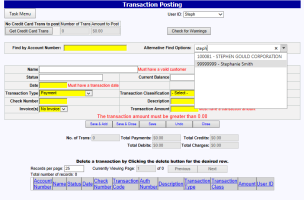
Once on this page, click the Add New button. You will need to have a list of the accounts you will be adding transactions to handy. You will see:
To get started, you can enter an account number in the "Find by Account Number" text box or alternatively, you can search for an account using the auto complete box . You can search by Account Number, Invoice Number or by name. As you begin typing, any matching accounts will display in the list for selection. Select the correct account. The system will automatically lookup the customer information and fill in the Name, status and current balance. Required fields are indicated in red.
The following information is needed to enter a transaction:
- Account Number –
- Transaction date – This is the effective date of the transaction.
- Transaction Type
- Payment – Reduce the account balance. Use when the customer has paid with check or cash or other manual payment method.
- Credit – Reduce the account balance. Use when making account adjustments. This type of transaction can also calculate taxes associated with the adjustment. See below.
- Debit – Increase the account balance. Use when making account adjustments. This type of transaction can also calculate taxes associated with the adjustment. See below.
-
Transaction Classification - This drop down is filled based on the Transaction Type selected. This field allows the transaction to be classified using a list of predefined options. Each classification has a description and a numeric code that can be used to group like transactions. This field is optional. If one is selected, the Description field will automatically be populated.
NOTE: The available classifications include both client defined and system defined values. This field also controls any taxing implications for the transaction as described in the Transaction Classifications Admin Tool.
- Check Number – Should be entered when available for check payments.
- Description – This will appear on the customers invoice. It is set based on the selected Transaction Classification but can be overridden.
-
Transaction Amount – This is the amount of the transaction. Some system defined Transaction Classifications will automatically set the amount, otherwise, it must be set by the user.
NOTE: The amount is always a positive number. The selected Transaction Type determines if the customers balance will be increased or decreased.
Transaction Type Overview
Certain transaction types have the ability to apply amounts to previous invoices, unpaid invoices, unpaid debits, etc. The table below outlines the Invoice Selection Options available for All Transaction Types including those for Special Case Transaction Classifications:
|
TransType |
TransClass |
Invoice Selection Options |
Notes/Comments |
|
P - Payments |
All except 801 |
All open/unpaid invoices and debits. |
The amount displayed is the unpaid amount (not the total amount) |
|
|
801 - Payment On Write-Off Account |
N/A |
No unpaid invoices will exist. By default, the system will automatically perform a “998 - Reverse Bad Debt Write-Off” and apply payment to the oldest open invoice(s). |
|
R - Credits |
889 - Invoice Credit |
All Invoices |
|
|
|
800 - Credit Taxes Only |
All Invoices |
User cannot set amount paid |
|
|
955 - Bad Debt Write-Off |
N/A |
Uses cannot set amount paid, the total balance due will be credited starting with the most recent invoice(s). |
|
|
Credit on Write Off Account |
|
|
|
|
All others |
All open/unpaid invoices and debits. |
|
|
D - Debits |
998 - Reverse Bad Debt Write-Off |
N/A |
Users cannot select the invoice, cannot set amount paid |
|
|
All others |
N/A |
|
|
C - Charges |
N/A |
N/A |
Users cannot enter Charge Transactions. They are created from billing. |
Controlling Duplicate Transactions
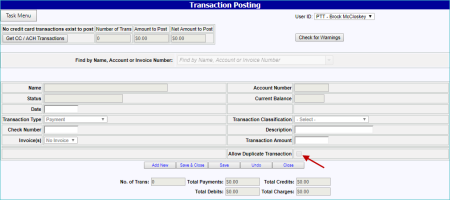
You can control whether or not duplicate transactions are allowed via the Allow Duplicate Transaction check box.
If this check box is selected (checked), the duplicate record can be saved. If the check box is cleared (not checked), an error message is displayed, stating that duplicate records are not allowed (and the record is not saved).
Applying Payments or Credits to Unpaid Invoices or Debits
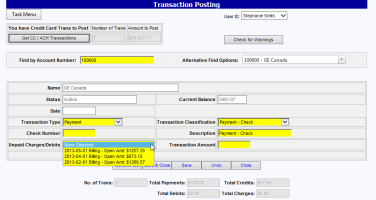
Payments and Credits can be entered and have the amount applied to any Unpaid/Open Invoice or Debit transaction. A list of Unpaid Charges/Debits will appear in a dropdown for selection. This is an optional feature.
Tracking paid / unpaid Invoices and Debits can be viewed from the Transactions tab. A new column has been added to show if a Debit or Invoice has been paid or not. This column only applies to Debits or Invoices.
Important Notes regarding this new feature:
- For payments that spread over multiple invoices, these should be broken up into two separate transactions.
- If a payment or credit is applied to an invoice/debit and there is leftover after the invoice is satisfied, this amount will be applied to the oldest open invoice. If there are no open invoices, the customer will have a credit balance that will be used once the next charge/debit amount is created.
- Applying a payment/credit to a particular invoice or debit will impact how the Days Late is calculated.
Applying Taxes to the Transaction Amount:
If the Transaction Classification is setup in the system as "Taxable" (see Transaction Classifications Admin Tool), additional fields will be available to Preview and Apply taxes generated on the transaction.

Required taxing information includes:
- Service Type & Transaction Type combination - select the type of service the credit should tax as. If credits are needed for multiple Service Types, these will need to be entered as separate transactions.(Avalara Clients)
- Product and Service Code combination - select the type of service the credit should tax as. If credits are needed for multiple Service Types, these will need to be entered as separate transactions.(CSI Clients)
- Original Tax Date - used to calculate taxes at the time of the transaction date
- Location & NPANXX/Zipcode - The NPANXX and Zipcode will be auto-filled based on the location selected from the Locale drop down.
Clicking the Preview button will show all billable and non-billable taxes that will be generated using the Transaction Amount and Service Type combination. Options are available to include billable and non-billable taxes before saving the transaction. Note: Until the transaction is saved, the tax entries have NOT been saved to tax transaction reporting tables.
Saving Transactions
Save the record using one of three available options:
- Save & Add – Selecting this option saves the current record and prepares the entry screen for a new transaction.
- Save & Close – Selecting this option saves the current record and closes the Transaction Posting screen. The user will be returned to the Main Screen
- Save – Selecting this option saves the current record.
- After a transaction record has been saved:
- The new transaction will appear in the grid at the bottom of the page.
- The summary information (No. Transactions, Total Payments, Debits, Credits and Charge fields) will be updated for assistance with auditing.
Deleting Transactions
User can delete transactions from the Transaction Posting Page by clicking Delete next to the desired transaction in the grid at the bottom of the page. This delete will be tracked by the system. To view the delete log see How do I view deleted transactions?
Real-time Credit Card / Bank Account Transactions
When customers use the Pay Bill Tab to make real-time credit card or bank account payments, approved transactions are queued in the system before being applied to the customer's account. These queued payments appear in the top right portion of the transaction posting screen with a count and total payment amount. Clicking the"Get Credit Card/ACH Trans" button will pull these transactions into the table below for review prior to posting.

Posting Transactions
IMPORTANT: Users must Post Transactions to actually apply them to the customer balance. The Posting Process is run by selecting the Task Menu and then Post as shown below. See Step 2 of Transaction Processing Overview for more details.

NOTE: Until the transaction is posted to the account:
It will not be reflected on the customer account
TBS will prevent any other transactions on the account


