Notes
*Previously Comments - view legacy Comments documentation
| How do I get here? | Customers Menu ► Search ► Select Customer ► Communications tab ► Notes tab Notes inventory available from Customers, Channel Support and Reports menu *Notes can be accessed from Orders, Trouble Tickets and Products as well |
| Purpose |
Notes can be added to almost any type of object throughout the system: Customers, Orders, Trouble Tickets, Tasks and Products. All Notes will appear on the main Notes tab, while filtered Notes are available throughout the system depending on the module (i.e., if inside an Order, only Notes for that Order are shown). There are also Note Inventories available from the Customer menu, Channel Support menu and the Reports menu. These Inventories are filtered to their appropriate type except for the option under the Reports menu. This will show All Notes throughout the system. A Note can have one or more user tied to it which can trigger on-screen and email Notifications to the user. |
| Security | Comments Module |
| Taxing Impact | N/A |
| Commission Impact | N/A |
| Data Field Definitions | View Here |
Notes Grid:
Notes can be used throughout the system as a way to capture comments on a particular account. Notes only allow text entries (no html, images, etc.) and can be accessed from each major module within TBS.
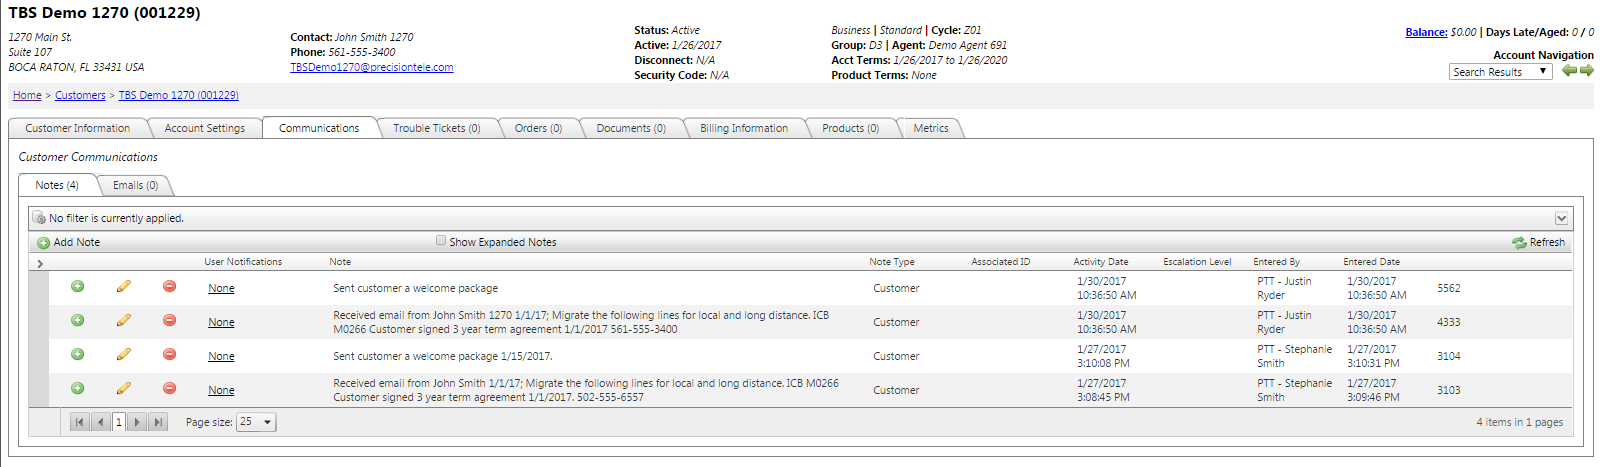
The main Communications Notes tab will show all Notes that have been entered for a particular account. The Type column indicates the module the Note is tied to and the ID column indicates and links to the Ticket, Order or ProductID that the Note is tied to.
When viewing Notes from an Order, Trouble Ticket or Product however, only Notes for that particular item will be displayed (unless a Note has been flagged to "Always Show on Top").
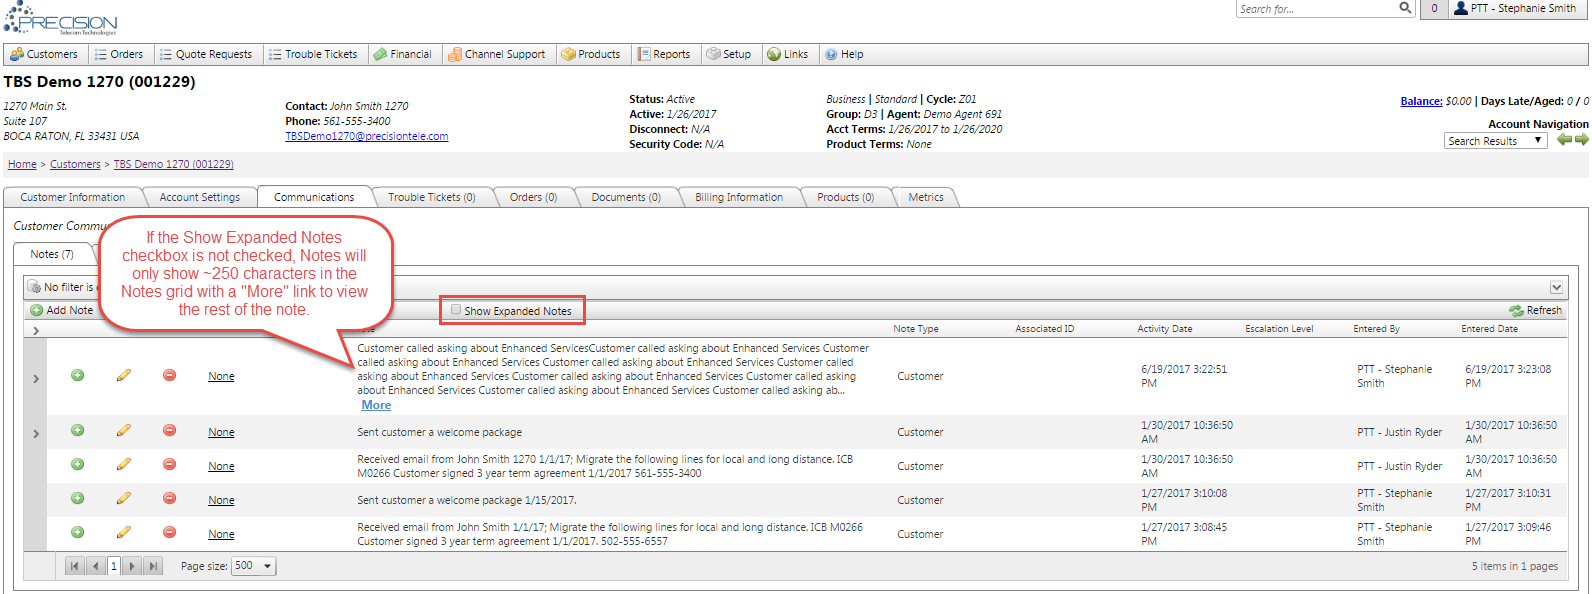
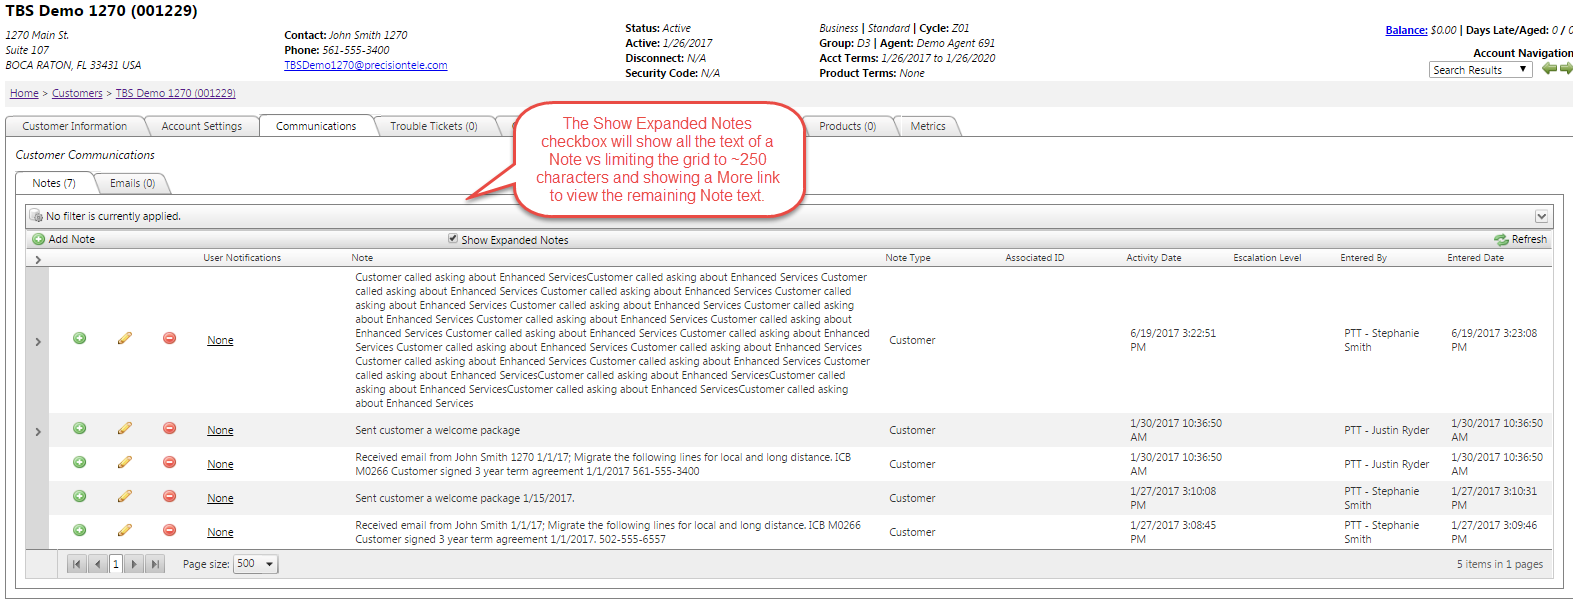
Show Expanded Notes
The Notes grid limits the characters in the Notes column to ~250 characters and then will show a "More" link to expand an individual note. The Show Expanded Notes Checkbox at the top of the grid will expand all Notes in the grid to show the full text of the Note description. This is available on the Customer Notes tab as well as in the Note Inventory grids.
Notes - Not Expanded, showing More link
Notes Expanded
Add A New Note
Use the Add Note link in the grid to add a new Note. Add rights to the Comments module is required. View the data definitions for more information about each field.
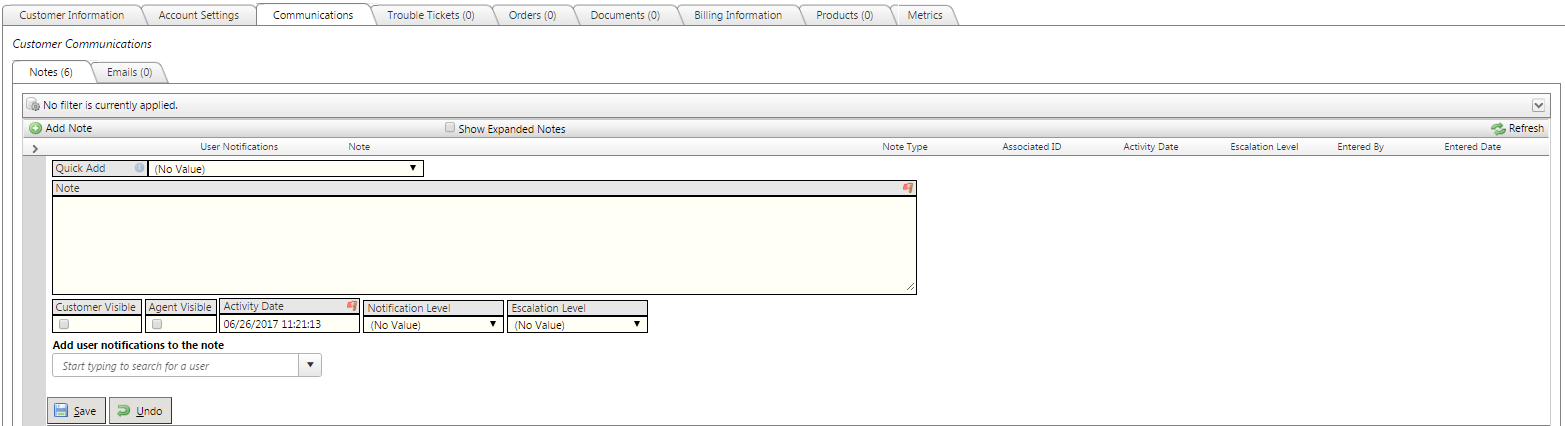
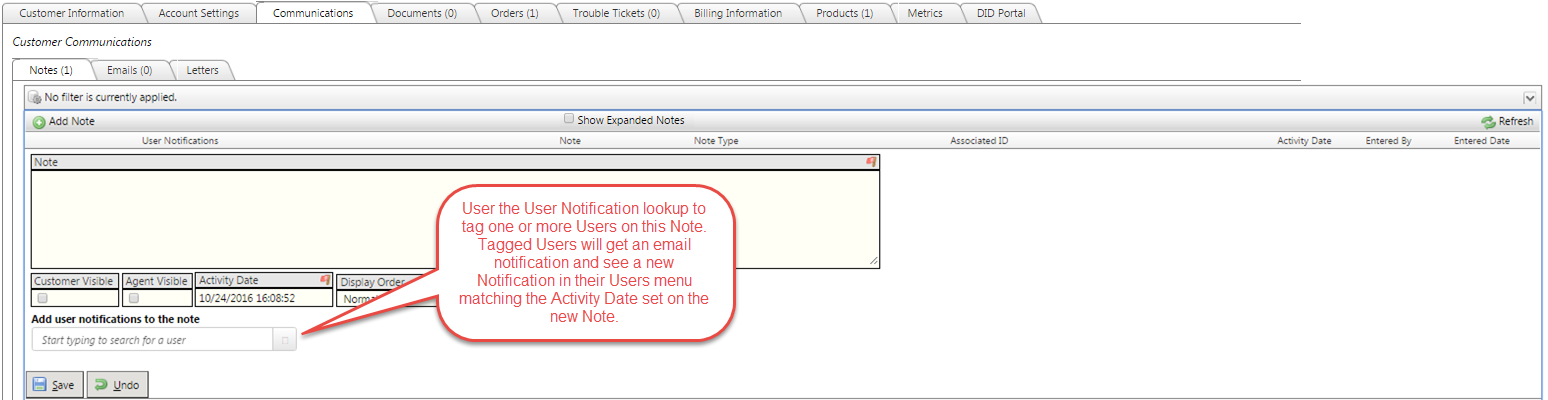
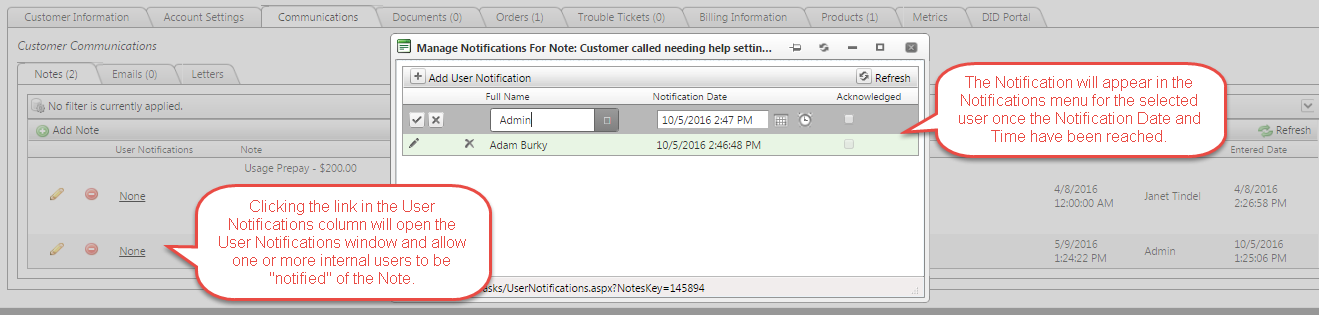
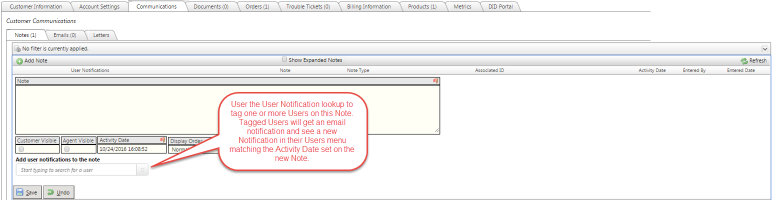
Users can be tagged using the User Notifications lookup dropdown. One or more users can be selected from this dropdown. When using this functionality, the notification will use the Activity Date as a Notification Date and display a notification in the tagged users' User Settings menu as well as send an email notification to the selected User(s). See Notifications section below for more information.
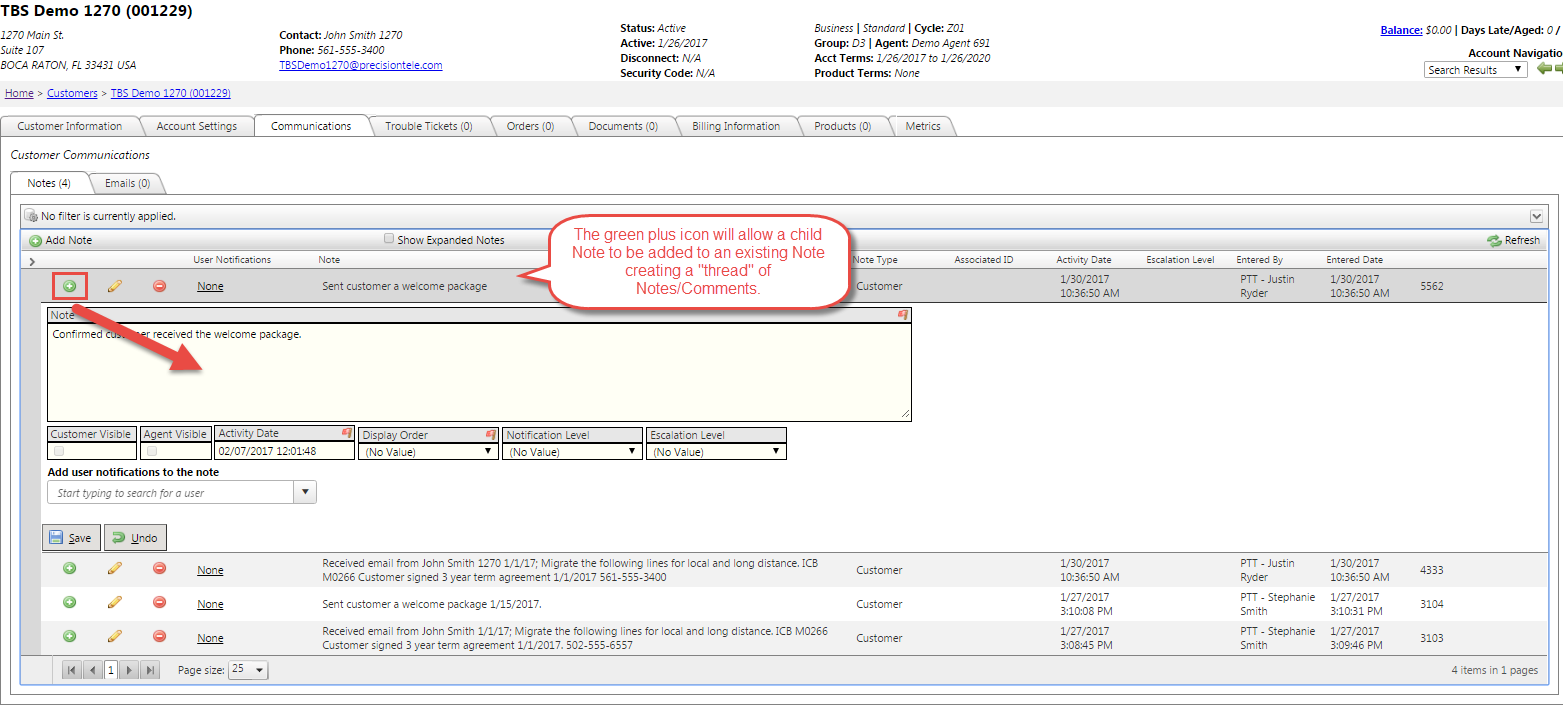
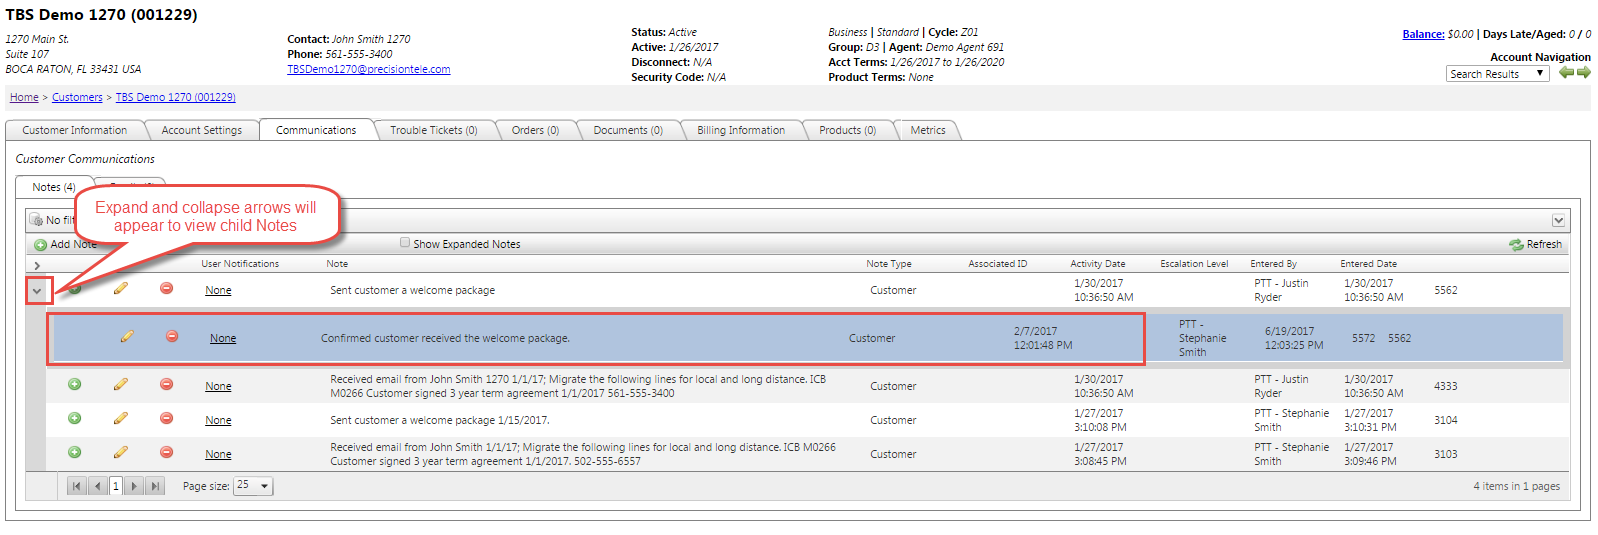
Parent Child Notes
New Notes can also be added as a child under an existing Note. This provides the ability to "group" like Notes/Comments into a thread. The Green plus icon allows a child note to be added to a parent. Once added, the grid will show expand and collapse icons to see child Notes.
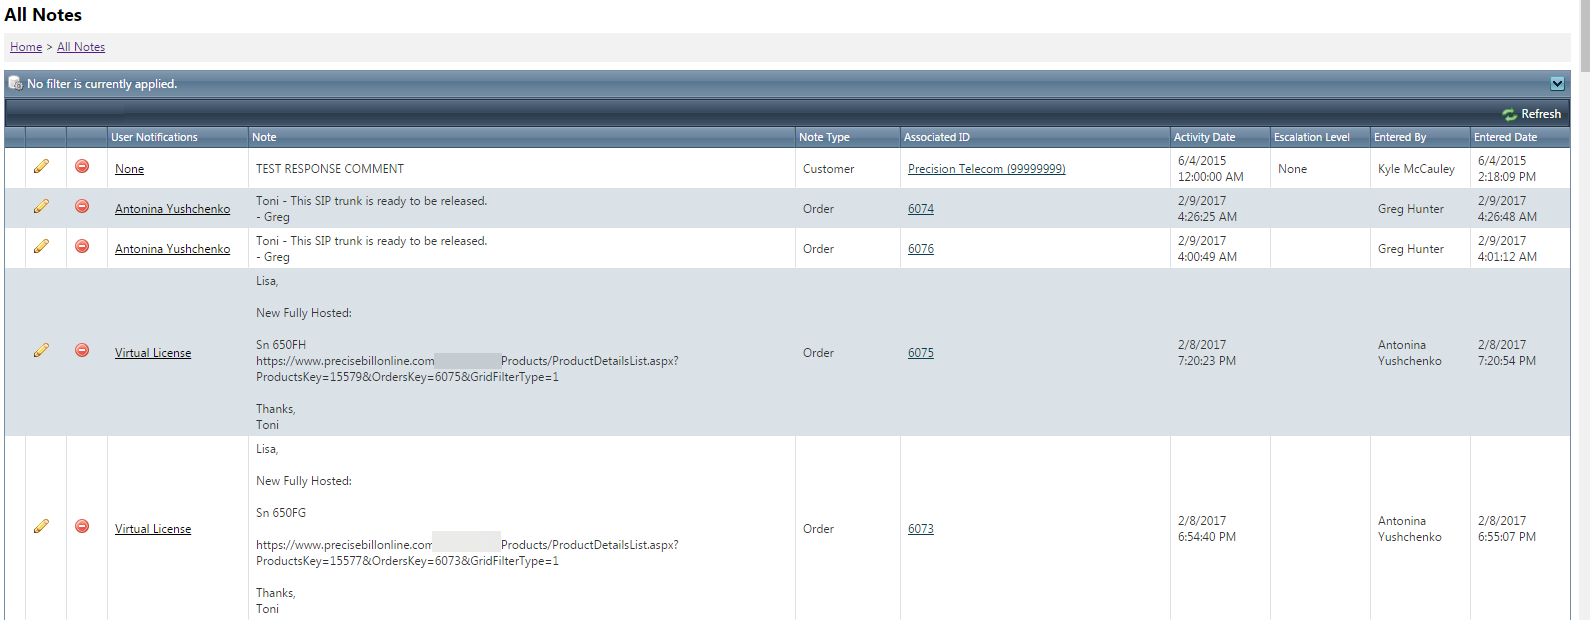
Note Inventory
An inventory of Notes is available from the Customer menu (filtered to only show Customer Notes), the Channel Support menu (filtered to only show Agent Notes) and the Reports Menu (shows all Notes in the system).
Data Field Definitions
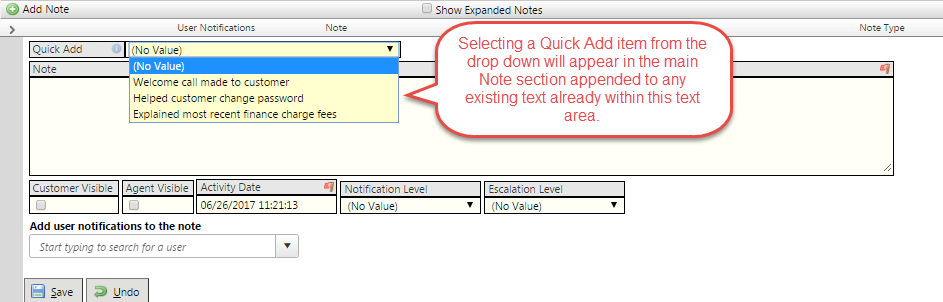
Quick Add - Provides the ability to quickly add common notes that often are repetitive. These options can be maintained using the Drop Down List maintenance tool and using the List Name='NotesQuickAdd'. When selecting a Quick Add from the drop down it will appear in the main Note section appended to any existing text already within this text area.

Customer / Agent Visible - All Internal users can see all Notes entered by Internal users. Additionally, options exist to allow Agents and/or Wholesale Customers to also see these Notes from their respective portals. Note: Standard Customers cannot see any notes.
Activity Date - The date associated with the Note. This will be considered when ordering Notes in the grid.
Display Order - This is a drop-down list and contains two values:
1) "On Top" - causes the Note to be displayed at the top of ALL Note lists on the account, including Customers, Orders, Trouble Tickets, and Products.
2) "Normal" - causes the Note to be displayed in the "normal" sort order of newest Activity Date, then newest Entered Date.
The purpose of this feature is to allow users to store important customer information without the need for customized fields. Some clients will use this to ensure that Network, Carrier, and/or Provisioning related information is always visible when working on an account. Note: Only users with Note.Admin permissions can change this field
Notification Level - the Notes module supports 3 Note Types that can be used to display Notifications on the Customer record. This was previously achieved with the "Show on Customer" option on comments or by using the Alerts tab. These options are all now part of the Note Notification Levels. The following Notification Levels are now supported;
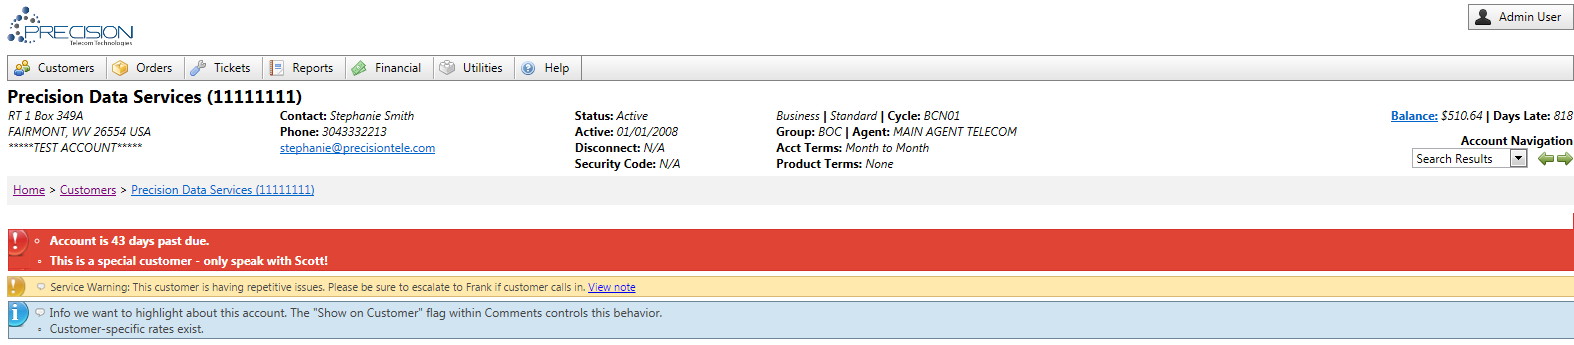
- Alert - this will display the Note text in a red bar across the customer record
- Warning - this will display the Note text in an Orange bar across the customer record
- Info - this will display the Note text in a blue bar across the customer record

User Notifications - A Note can have one or more user tied to it which can trigger on-screen and email Notifications to the user. Users can be tagged on a Note during Add New or by using the Notifications link from the grid. User notifications on notes can now only be assigned to internal users who are not disabled and have the Can Be Assigned Comments flag on the User Settings screen set to true.
Option 1: Tag users when entering a new Comment
Option 2: Tag users after a Comment has been entered
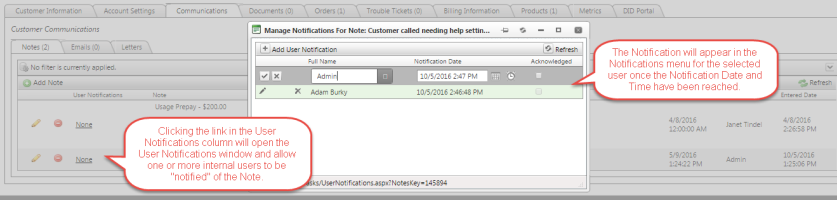
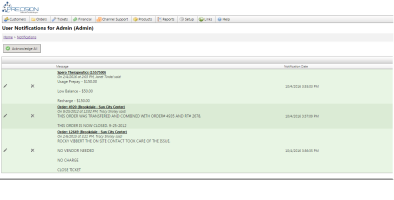
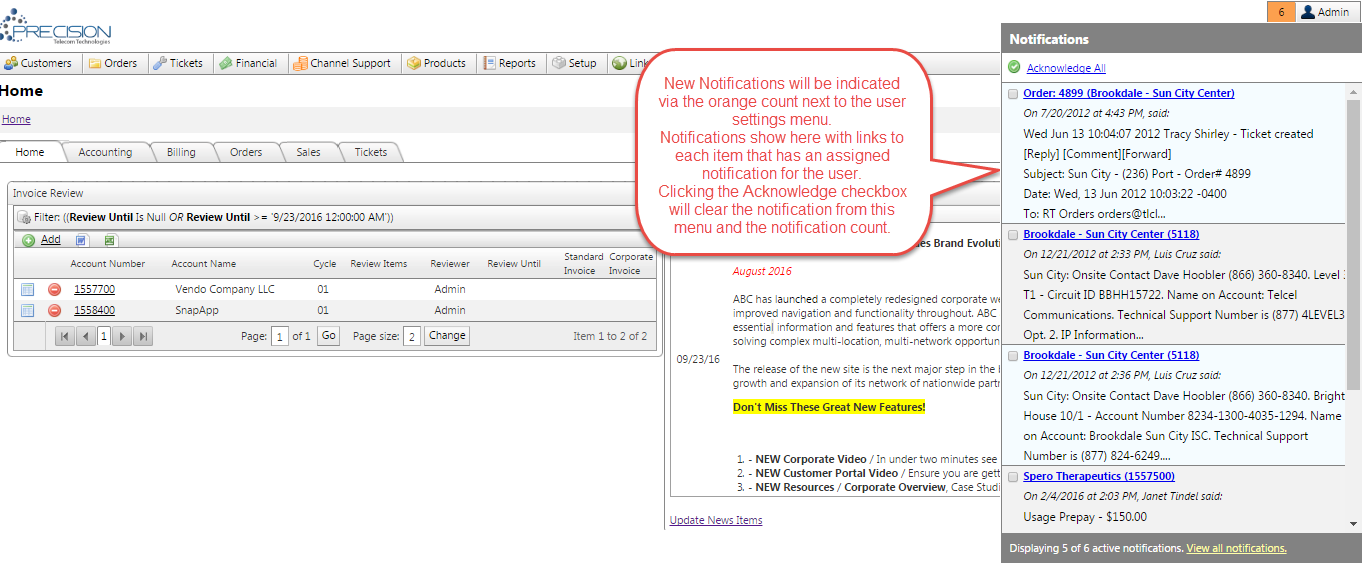
These notifications will appear on the top right user menu as an orange notification block with a number indicating the number of new notifications the signed in user has. Users can then "acknowledge" the notification to remove it from their list or click on the notification link for more details.
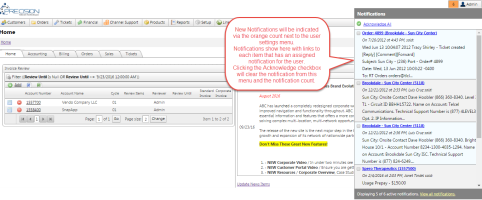
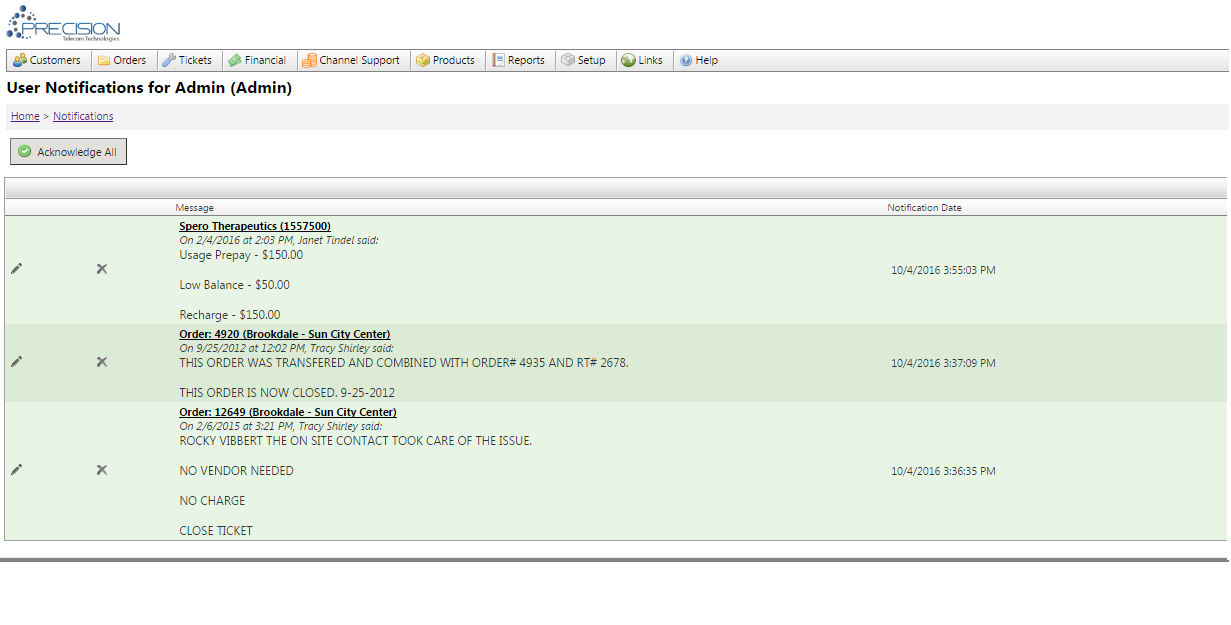
All Notifications can be viewed from the Notifications page which can be accessed via the "View All Notifications" link in the notification menu. This page will show all Notifications assigned, regardless of acknowledged state. It will also provide an option to acknowledge all notifications at one time if desired.